instructional article

Do you know the 4 fundamentals of Survival?

Knowing how to keep yourself alive is a fundamental human skill! In our increasingly convenient modern world some of these fundamentals can seem less important. When we can easily turn on the faucet and get water whenever we want it’s not hard to forget that one day you might be in a situation that doesn’t provide you with such a luxury.

In a moment your focus can shift from “ugh, my phone battery is at 7%” to “what do I need to stay alive through the night.” It’s best to have a store of age old human knowledge for just such an occasion.

The fundamentals of human survival can be simplified into 4 priorities:

Shelter
Water
Fire
Food

In that specific order. If you spend your time working on finding food before you have a shelter established you might just end up freezing to death with a full belly. Make sure you approach them in the right order!

When I started Colter Co. it was for the purpose of providing outdoor information in a format that was in itself multifunctional (enter the bandana…) I don’t really like packing books on camping trips, especially when weight and space is an issue. I’m super happy to add a TRUE wilderness survival bandana to our collection!

Yes, there are other survival bandanas on the market, so what makes this one better? It focuses not just on helpful outdoor skills, but on the PRIORITIES for your efforts. One of the biggest challenges of being in a survival situation is not panicking! Many other survival bandanas are a shotgun blast of facts and tactics that don’t help an already frantic mind know WHEN to take on your next task.

It’s also printed with high visibility reflective ink on a bright hunter orange bandana. Being visible is key to being found. When you build a shelter out of natural materials it can become very easy to blend in. The worst case scenario would be having a rescue team walk right past you while you sleep in your shelter. This bandana makes an awesome shelter marker and with the reflective ink it will light up super bright when hit by the beam of a flashlight.

As always, our bandanas are printed on American made cotton for superior durability and softness.

This is a great way to add a higher lever of preparedness to your survival kit! It also makes a great gift of knowledge and preparedness to a young adventurer.

If you can’t decide on which of our designs you love the most you can always make it a part of a 3 pack or a 6 pack :)

instructional article

Smoked Beef Jerky Recipe

smoked_jerky_colter_co

I got a smoker last year. It's something that I've been interested in for a while. Not just because it make amazingly mouthwateringly delicious food. It's the tradition of food preservation that I found compelling. Smoking foods to preserve them has been used for a very long time and I wanted to add it to my list of traditional skills.

I got in my head that I wanted to try making smoked beef jerky. Regularly beef jerky isn't my go to snack. I generally find it to be too sweet, or too soy saucey, or something. But I do like the idea of preserving meat that way, and I figured if I had more control over the recipe it might turn out more to my liking. 

I read a ton of recipes. There are no shortage of jerky recipes out there. 99% of them start with a ton of soy sauce. This has never made any sense to me. I know Lewis and Clark subsisted on a lot of dried meats, and I KNOW they weren't lugging around barrels of soy sauce. It just doesn't seem very traditional to me. So I made my own recipe with apple cider vinegar instead of soy sauce. 

Before I get to the recipe, let's talk about the smoker. I'm using a Weber charcoal smoker. I call it the R2-D2 model. Not sure what it's really called. I modded my by added 4 screws near the top which allows you to put the meat rack up higher. It worked great for hanging jerky.

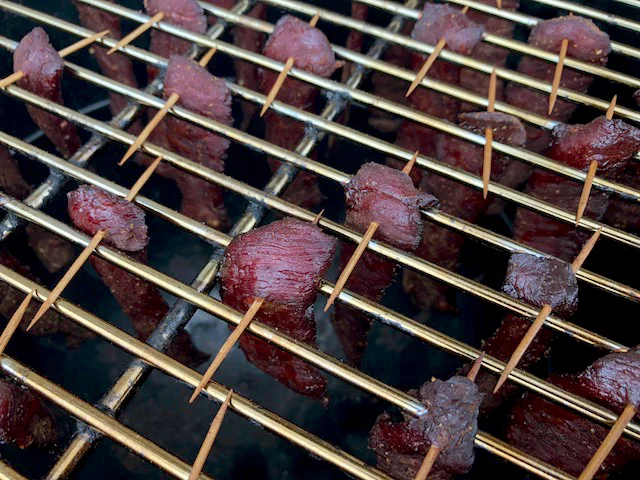
I've used electric smokers and prefer the charcoal. I made a ring of unburned charcoal in the shape of a "C" in the bottom of the smoker and added about 12 live coals to one end. It ends up acting like a charcoal fuse and burned plenty long for this. I put apple wood chunks along the top of the coals and they smoldered and produced nice smoke as the "fuse" burned. It stayed right about 180 degrees the whole time. I ended up smoking the jerky for 3.5 hours and it ended up more smokey than it needed to be. Next time I'll give it a good smoke for an hour and then let it dry out at 180 degrees for another two hours. 

Prepping the beef! There are plenty of different cuts that will work. Look for something lean. You're going to want to cut off as much of the fat as you can. Don't worry too much about marbling in the meat. It will render out on the smoker. Partially freezing the beef before hand helps make the slicing process easier. Slice it 1/4 thick. You can slice with the grain for a more firm jerky or across the grain for a jerky that pulls apart more easily.

The Recipe:

- 2 lbs. of lean beef
- 1/2 cup Apple Cider Vinegar
- 1 Tbs Worcestershire sauce
- 1 tsp ground black pepper
- 1 tsp Kosher salt
- 1 tsp ground coriander
- 5 cloves of garlic (diced as small as you can)
- 1 tsp Molasses
- 1/2 tsp Cayenne pepper

Mix all these together, and marinate the sliced beef for at least a few hours (I did overnight.) After it's good and marinated pull the strips of beef out and dry them off with a paper towel. Run a tooth pick through one end of each strip. This allows you to hang them vertically in the smoker and saves a lot of space. I add a bit more fresh ground pepper at this stage and then on to the smoker they go! Make sure the temperature stays around 180 degrees. Keep and eye on it to make sure the temperature is right and it's still producing good smoke. 

smoked_jerky_colter_co

When they're done take them off, remove the tooth picks and dab off the rendered fat with a paper towel. Enjoy it fresh of vacuum seal and store in the freeze for long term storage. I bet it won't last long enough to need to store it though :) 

As I said, this was the first time I tried this, but will NOT be the last! My 8 year old son (who helped me) refers to it as "Beef Bacon." That a pretty accurate description! It was a huge hit with the family. Give it a try and let me know how it goes!

instructional article

DIY Fire starter smack down

I've seen a few different kinds of DIY fire starters ideas floating around. I wanted to try a couple out and see which performed better. I'm also doing this with my 8 year old son to each him about the elements that make a good fire starter. I chose to do a wax & cotton version and a wax & saw dust version. I'm evaluating these based on a few factors: 

1: Ease of creation (with kids)
2: Ease of lighting with a ferro rod.
3: How long do the burn.
4: Simplicity of ingredients

I'll include a step by step of how to make each below, but first... How do they stack up!?

colter co fire starter smackdown-01.jpg

After trying both of these I like them both for different reasons. The wax & cotton fire starters are super easy to make. They are compact, water resistant and easy to light with a ferro rod. Either of these fire starters would be super easy to light with matches or a lighters.

The advantage of the wax & saw dust fire starters is the burn time. They burn a very long time. Living in the Pacific Northwest one of the major concerns for getting a fire started is working with damp wood. Having a full 13 minutes of burn time to work with gives you a much stronger chance of burning some of the moisture out of damp wood and getting a good blaze going. 

Now for the How To:

WAX & COTTON FIRE STARTERS

Using a double boiler melt wax or paraffin in an empty tin can. I opted for the tin can option because I didn't feel like getting murdered by my wife for ruining another pan :) It makes clean up easy... just toss the can into the recycling bin. I used 6 votive candles to make 22 fire starts.

IMG_1082.JPG

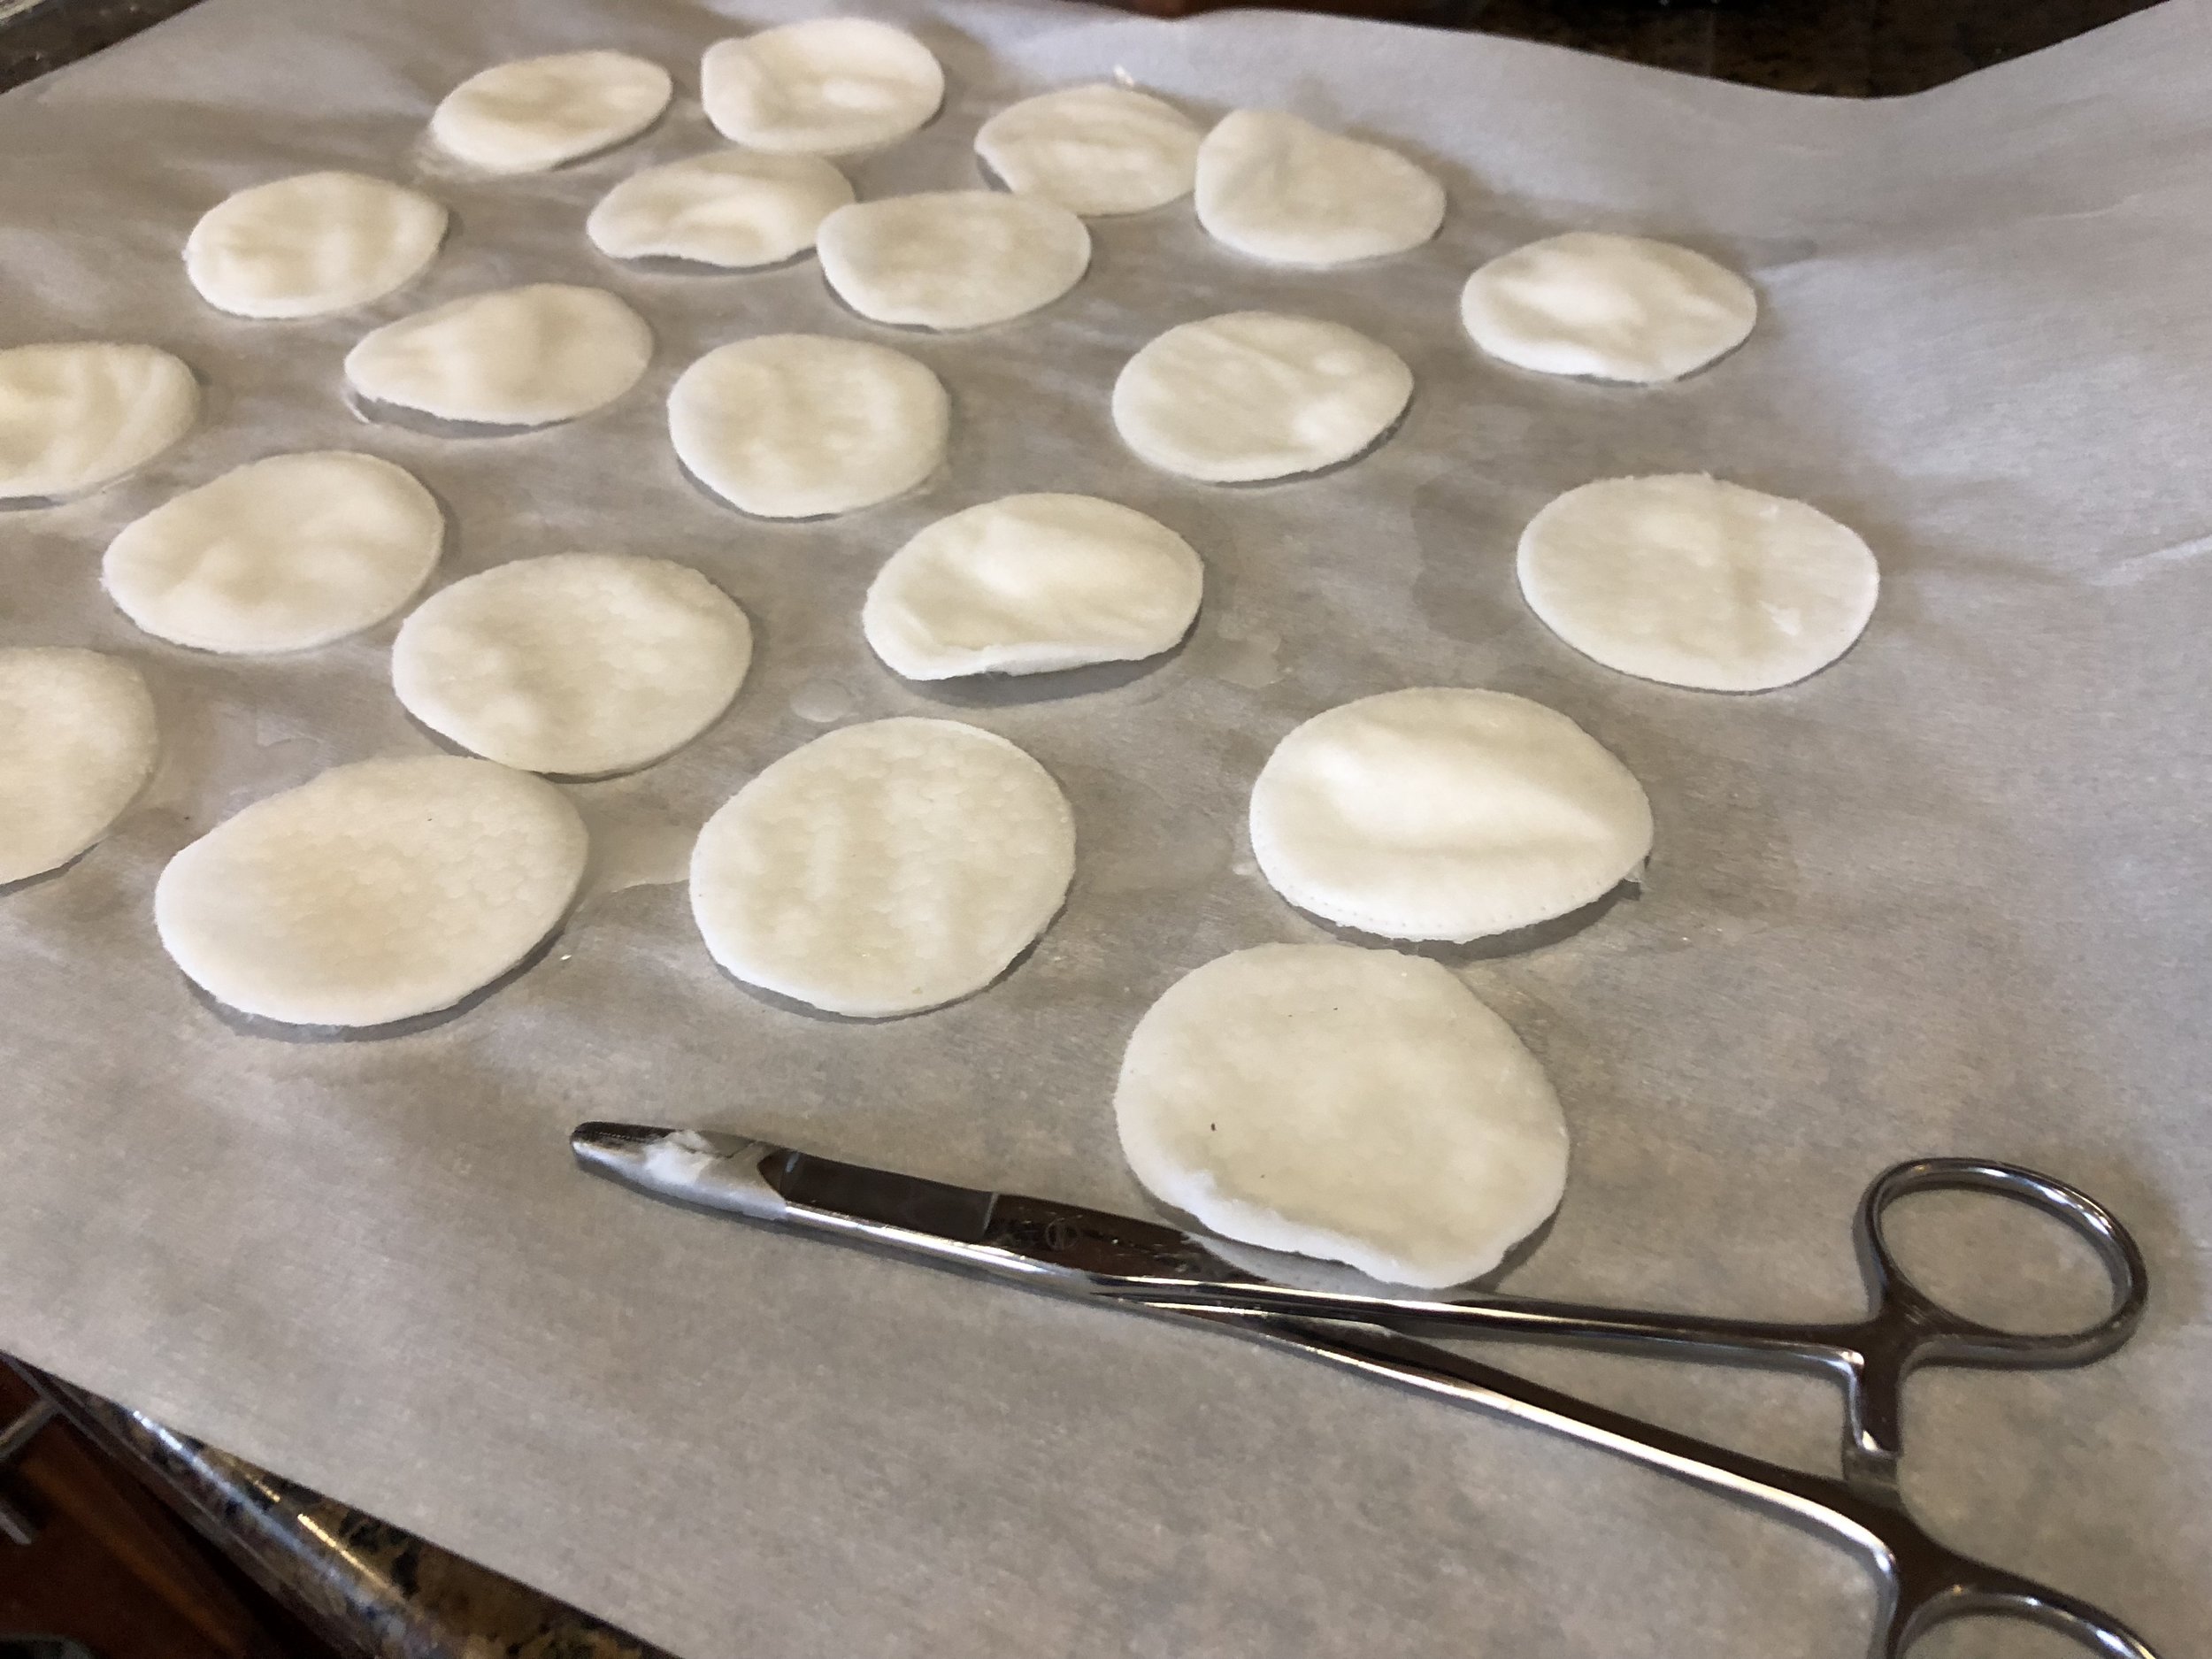
Cover a cookie sheet with a layer of parchment paper. Once the wax is melted dip 100% cotton rounds into the wax briefly. Let the excess wax drip off back into the can before placing them on the parchment paper to cool. I recommend holding the can over the parchment paper to avoid creating a trail of dripped wax. 

colter co fire starter

That's really about it! Once they cool they're ready to put into your fire starting kit for your next outing. When you use them, you can tear them in half to stretch them farther if you need to. Rough up the cotton fibers as fluffy as you can get them if you're using a ferro rod to start these.

colter co fire starter
Screen Shot 2018-01-20 at 3.24.09 PM.png


WAX & SAW DUST FIRE STARTERS

Find a couple empty paper towel tubes or toilet paper tubes. Mark 1" increments along the tube. Cut along those lines to create 1" cardboard discs. These serve as molds for the saw dust. 

colter co fire starter
IMG_1079.JPG

Fill the molds with dry saw dust on parchment or wax paper. Pack it in as well as you can. Next melt the wax in a doubler boiler as described in the wax & cotton directions. Carefully pour the wax over the saw dust. Remember that sometimes when you pour liquids slowly then can drip down the front of the can and off the bottom. Just make sure that you have both potential drip points over the parchment paper before you start pouring. 

colter co fire starter

Let them cool down and then peel the cardboard tube off and they're ready to go! I used a little bit of shaved magnesium with the ferro rod to get these going. Again, with a match or a lighter these things would light up like a Christmas tree. 

colter co fire starter

This image does a good job of showing the difference in flame between these two. The wax & cotton burned really well, but the wax & saw dust burned really high and long. If you feel up to taking the extra steps and mess, the saw dust is pretty great! I feel like the combination of the two is pretty solid as well. If you put even a quarter of the cotton fire starter on top for a quick easy light and a big chunk of the saw dust and wax on the bottom you'd be set. 

Let me know if you have a favorite DIY fire starter! 

article

Knot tying was the first outdoor skill that I learned on my own. I found an old wilderness survival book and followed the diagrams until I figured out every knot in the book. It was incredibly empowering! I loved that book and carried it with me everyday until it got water damaged, dog eared, ripped, and eventually fell apart. I still carry those knots with me in my mind (although I do occasionally need a refresher on a more obscure knot). After years of using and teaching these knots I decided to make a knot tying guide that wouldn't suffer the same fate as my beloved book. I narrowed it down my top 16 most useful knots and put them on a bandana. The bandana itself serves a thousand uses and, unlike a book, doesn't have any issues with water. It's a powerful tool for teaching (and reminding the old woodsman.) If you have kids that are just starting to learn outdoor skills, this is a great way to give them the assets they need to learn on their own. It's a memory and a skill that will stay with them the rest of their lives.