camp food

instructional article

Smoked Beef Jerky Recipe

smoked_jerky_colter_co

I got a smoker last year. It's something that I've been interested in for a while. Not just because it make amazingly mouthwateringly delicious food. It's the tradition of food preservation that I found compelling. Smoking foods to preserve them has been used for a very long time and I wanted to add it to my list of traditional skills.

I got in my head that I wanted to try making smoked beef jerky. Regularly beef jerky isn't my go to snack. I generally find it to be too sweet, or too soy saucey, or something. But I do like the idea of preserving meat that way, and I figured if I had more control over the recipe it might turn out more to my liking. 

I read a ton of recipes. There are no shortage of jerky recipes out there. 99% of them start with a ton of soy sauce. This has never made any sense to me. I know Lewis and Clark subsisted on a lot of dried meats, and I KNOW they weren't lugging around barrels of soy sauce. It just doesn't seem very traditional to me. So I made my own recipe with apple cider vinegar instead of soy sauce. 

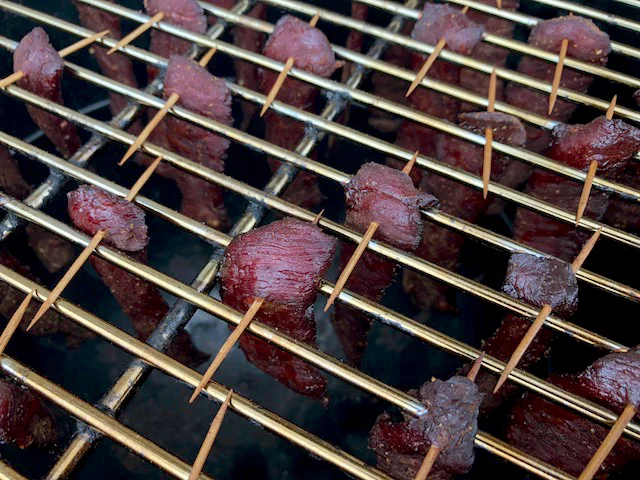
Before I get to the recipe, let's talk about the smoker. I'm using a Weber charcoal smoker. I call it the R2-D2 model. Not sure what it's really called. I modded my by added 4 screws near the top which allows you to put the meat rack up higher. It worked great for hanging jerky.

I've used electric smokers and prefer the charcoal. I made a ring of unburned charcoal in the shape of a "C" in the bottom of the smoker and added about 12 live coals to one end. It ends up acting like a charcoal fuse and burned plenty long for this. I put apple wood chunks along the top of the coals and they smoldered and produced nice smoke as the "fuse" burned. It stayed right about 180 degrees the whole time. I ended up smoking the jerky for 3.5 hours and it ended up more smokey than it needed to be. Next time I'll give it a good smoke for an hour and then let it dry out at 180 degrees for another two hours. 

Prepping the beef! There are plenty of different cuts that will work. Look for something lean. You're going to want to cut off as much of the fat as you can. Don't worry too much about marbling in the meat. It will render out on the smoker. Partially freezing the beef before hand helps make the slicing process easier. Slice it 1/4 thick. You can slice with the grain for a more firm jerky or across the grain for a jerky that pulls apart more easily.

The Recipe:

- 2 lbs. of lean beef
- 1/2 cup Apple Cider Vinegar
- 1 Tbs Worcestershire sauce
- 1 tsp ground black pepper
- 1 tsp Kosher salt
- 1 tsp ground coriander
- 5 cloves of garlic (diced as small as you can)
- 1 tsp Molasses
- 1/2 tsp Cayenne pepper

Mix all these together, and marinate the sliced beef for at least a few hours (I did overnight.) After it's good and marinated pull the strips of beef out and dry them off with a paper towel. Run a tooth pick through one end of each strip. This allows you to hang them vertically in the smoker and saves a lot of space. I add a bit more fresh ground pepper at this stage and then on to the smoker they go! Make sure the temperature stays around 180 degrees. Keep and eye on it to make sure the temperature is right and it's still producing good smoke. 

smoked_jerky_colter_co

When they're done take them off, remove the tooth picks and dab off the rendered fat with a paper towel. Enjoy it fresh of vacuum seal and store in the freeze for long term storage. I bet it won't last long enough to need to store it though :) 

As I said, this was the first time I tried this, but will NOT be the last! My 8 year old son (who helped me) refers to it as "Beef Bacon." That a pretty accurate description! It was a huge hit with the family. Give it a try and let me know how it goes!

instructional article

A buchcraft meal in a tube

IMG_0760.jpg

I came across a fantastic book called "Camping and Woodcraft" by Horace Kephart. Published in 1957. It is jam packed with amazing traditional outdoor skills, gear and ideas. I recommend checking it out!

One of the things it mentioned is a food called Erbswurst. Which translates from German to mean pea sausage. I know, it sounds terrible, but hear me out! It's a mix of fats, and split pea flower squeezed into a sausage casing that was used heavily by the German soldiers during WWI. You can cut about an inch off the sausage and boil it to create a rich pea soup. And because of the high fat content it's very shelf stable. It's really an ideal survival and bushcraft food. It doesn't take up much space or require much prep work to make. 

I decided to try this idea out, but I wanted to make a few adjustments. First of all, I decided to use lentil flour instead of pea flour. I prefer lentil soup and it's slightly higher in nutritional value. 

I also adjusted the ingredients slight because I had a hard time finding hard fat. It's the pork fat that holds it's form and gives sausage its structure. I replaced the hard fat with regular pork fat sliced off a pork chop at the meet department of my local grocery store. 

Here's my complete recipe: 

Linsewurst (lentil sausage)

- 1/2 lbs. bacon
- 1/2 lbs. pork fat
- 1 lbs. Lentil flour
- 1/2 onion
- 3 teeth garlic
- Salt and pepper as desired


colter co erbswurst

I began by putting the bacon, fat, onion an garlic in a food processor and turning it into a paste.

colter co erbswurst

I put that paste into the frying pan and cooked it until it the fat rendered out and the onions and garlic cooked through. 

colter co erbswurst

While that was cooking I put the lentils into our Blendtec blender. It turned them into a nice powder pretty quick. There are other ways to do it. A grain mill or another heavy duty brand of blender will do as well. 

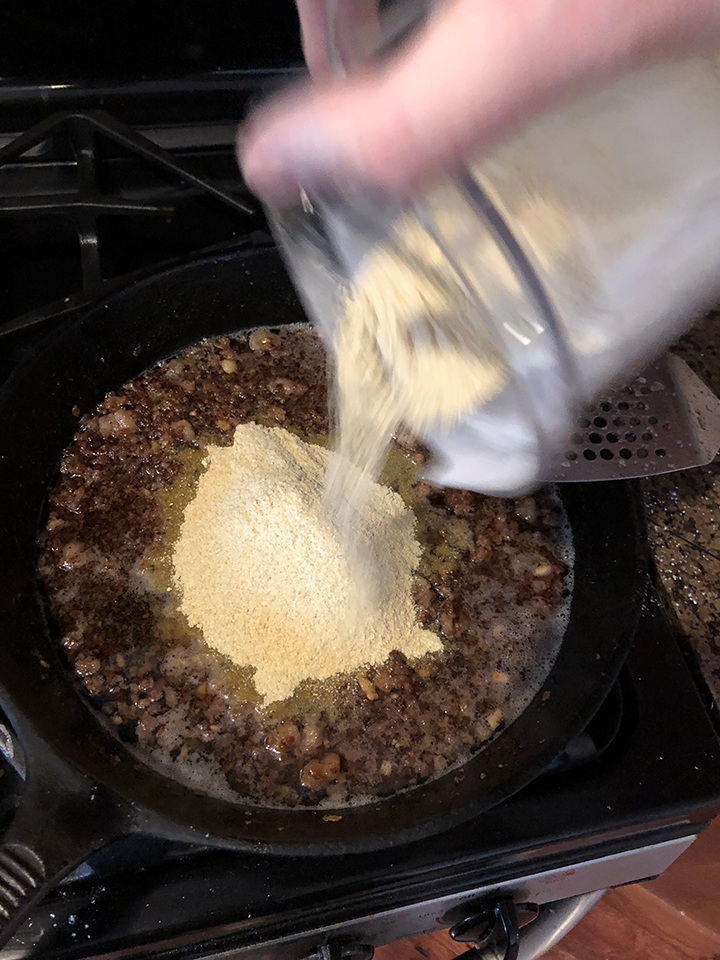
When the bacon and onion mixture is nicely browned add the lentil flour. Mix it together well and be ready to work with it while it's still warm. It will start to set up once it cools and that makes everything more difficult. Because I didn't use the hard fat, it made the final product more soft and easier to work with. 

colter co erbswurst

Traditionally this mix would then go into a sausage casing. I didn't have any laying around and did really want to do that anyway, so I make my own casings out of vacuum seal bags. The long term storage of these in a freezer is my end goal and these bags made sense and are super easy to make custom sizes and fill. I used a funnel to force the mixture down into the make shift casing. 

colter co erbswurst
colter co erbswurst

Then I just sealed them up and blamo! you got a lentil sausage!

colter co erbswurst

I did a little backyard field test to see how it turned out. I mixed 1 tablespoon of mix for each cup of water. So each tube would be about 6-8 servings of soup! I boiled it for about 5 minutes to give the lentil flour a chance to turn into a nice broth. It was very satisfying and hearty. 

colter co erbswurst

In the end, I think this makes a fantastic base for wilderness improvisation. I might try a version with different seasoning, and a version with black bean flour instead of lentil. I plan on using it to add fresh foraged plants to on my next outing. I think a hand full of sliced nettle leaves, or a thistle root boiled in this could be pretty amazing! 

This soup is great to use in connection with our Forager bandana. It identifies and explains 7 common edible plants. Several of which would work nicely in this base. I will be using both this year with my kids to help them gain more knowledge and appreciation of wild plants. 


Please let me know if you have any experience with traditional Erbswurst. I'd love to hear it!