news

New Product Launch: Know Your Knots Practice Rope Kit

Colter Co. is happy to announce the Know Your Knots Practice Rope Kit. The perfect, portable way to keep your knot tying skills fresh. The kit includes two 5' lengths of smooth quality climbing rope with a oiled tanned leather and brass utility strap, and a Know Your Knots bandana for reference. Throw it in your pack and practice around the campfire. Or on the bus. Or during a conference call (no one can see you over the phone.) Once you've mastered the 16 knots on the bandana you'll be able to tie your way out of just about any jam that comes your way. 

This makes a great gift for a new scout, as a rank advancement gift, or to the diehard outdoorsy person in your life. I do believe there's a father's day coming up... Just saying

You can buy it here

know-your-knots-practice-rope-kit_survival-bandana
know-your-knots-practice-rope-kit

instructional article

Bandana Use #147: Water filter

The internet is full of tips and tricks and gadgets. Half of which make me wonder if they really work. Some I know for a fact do not work. So before I repost anything I like to make sure it's legit. One I've been wondering about for a while is this diagram I found of a water filter tower made from 3 bandanas, and layers of grass, sand and charcoal. 

bandana water filter_survival bandana

On my last camping trip I decided to put it to the test. I did some modifications for my design. I wanted to limit it to one bandana, and simply layer the materials in that bandana. I did a base layer of sand, then rocks, then dry grass. MAJOR FUNCTIONALITY NOTE!!! This type of filter is NOT meant to make water safe to drink. It does not remove any kind of pathogens, or water born illness. It is meant to remove sediment making it easier to prepare for boiling or some other form of treatment. 

I started by making a 4 sided "quadpod". I make this the same way I would a tripod, but with an extra pole (for those really bad at math). Start with 4 equal length branches. 

tripod-lashing
clove-hitch

Tie a clove hitch around the first branch. Then weave the rope over and under the other branches. When you get the end, weave the rope back the other way. Do this 3-4 times. You can simply wrap the rope around the outside of all the branches, but the weaving method creates better friction and will hold better.

tripod-lashing

After that wrap the rope between each of the branches vertically to cinch down on the weave and tighten the whole thing up. This is called frapping. Then finish off with another clove hitch. 

tripod-lashing

Then you can stand it up and space the branches apart. Tada! You've got a quadpod. This little structure has an endless list of uses. It can be used as the beginning of a shelter, or to hang a pot over a fire, as the starting point for a latrine or a dining table (don't get those two mixed up...). I could go on for ages.

tripod-lashing

To connect the bandana to the quadpod, I tied two half hitches around a small pebble in each corner of the bandana and tie the other end of each rope to a branch. 

pebbles-for-water-filter
bandana-corner-tie-down
corner-tie-down
bandana-corner-tiedown
bandana-water-filter-stand

I am using our Know Your Knots bandana for this one (it does feature the two knots used to create this contraption.) At this point I started filling the bandana with fine sand, then gravel and last a thick layer of dry grass. 

bandana-water-filter

Next I grabbed some excessively gross water and poured it over the top of the grass. 

bandana-water-filter
bandana-survival-water-filter

Here's a clip of the filter in action. You can see there's a major difference in the before and after!

The results were good. I found that I needed to run the water through a few times to get most of the sediment out, but it was certainly effective. If I were to do it again (and I probably will) I would make sure to wash the sand ahead of time. I think a lot of the first couple runs were just washing the soil from the sand out. A triple layered version of this would be more effective, but would also take more time to set up.

I would love to hear about your experiences with anything like this. 

-John

Tyler & Becca hike the PCT

The Pacific Crest Trail stretches from the border of Mexico in California to the border of Canada in Washington state covering a staggering 2,663 miles. It goes through some of the most beautiful places on the West Coast including the Sierras, Yosemite, John Muir Wilderness, Ansel Adams Wilderness, Mt. Shasta, Crater Lake, Three Sisters Wilderness, the Cascade range, Mt. Hood, Mt. Rainer, Mt. baker and more. I have had the chance to hike several sections of the trail through some of the most amazing and pristine wilderness I've witnessed. 

MtBanner and Thousand Island Lake
Pacific_crest_trail_map

Tyler and Becca (friends of ours) are hiking it this year. All of it. I'm very excited for them and can't wait to hear about their trip and will try very hard not to let jealousy completely overcome me.  Before they begin I got the scoop on their plans and their gear list. 

Colter Co.: Why did you decide to hike the PCT?

Tyler: It has been something that we’ve wanted to do ever since we found out about it. We started really getting into backpacking about 4 years ago and it was something that we added to our bucket list. There was kind of a perfect storm of transitions going on in our lives so we decided that now may be as good a time as any. It was a now or maybe never sort of scenario.

CC: How long have you been planning for this?

T: We bought our plane tickets at the very beginning of the process and that was sometime at the end of last July. It’s been almost a 9-month planning process. We figured that it would be easier financially to spread things out over a longer time. It’s allowed us some opportunities for trial and error with gear and meal planning, so it’s worked out. We definitely don’t think that it requires that long of a planning period, but we’re doing this for two people with twice as much to think about. The bulk of our preparation really started about 3 or 4 months ago. At that point it was what we did every weekend and any other free time that we had.

CC: What do you think will be the biggest challenge?

T: We both think that at first the physical challenge of hiking in the heat will be the hardest. We’re not looking forward to the long stretches without water, especially with the low snow pack this year. After we get into a rhythm and start to get situated it’s going to be more of a mental challenge to do it day in and day out. The good thing about hiking together is that we’ll have a built in support system to keep each other going. We’d be more concerned about it if we were hiking alone.

CC:  Which parts of the trip are you looking forward to the most?

T: Definitely the Sierra’s. We’re both dreading the desert so it will be nice to see the transition into the higher elevation mountains. We ‘ve decided to hike Mt. Whitney as a side trip, so that will be a highlight as well. We both are really looking forward to overcoming challenges, meeting new people, and just experiencing the overall culture of the PCT.

CC:  What is your gear list? What is your base weight?

Becca’s base weight is 13 lbs. 6 oz.
Tyler’s base weight is 16 lbs. 2 oz.

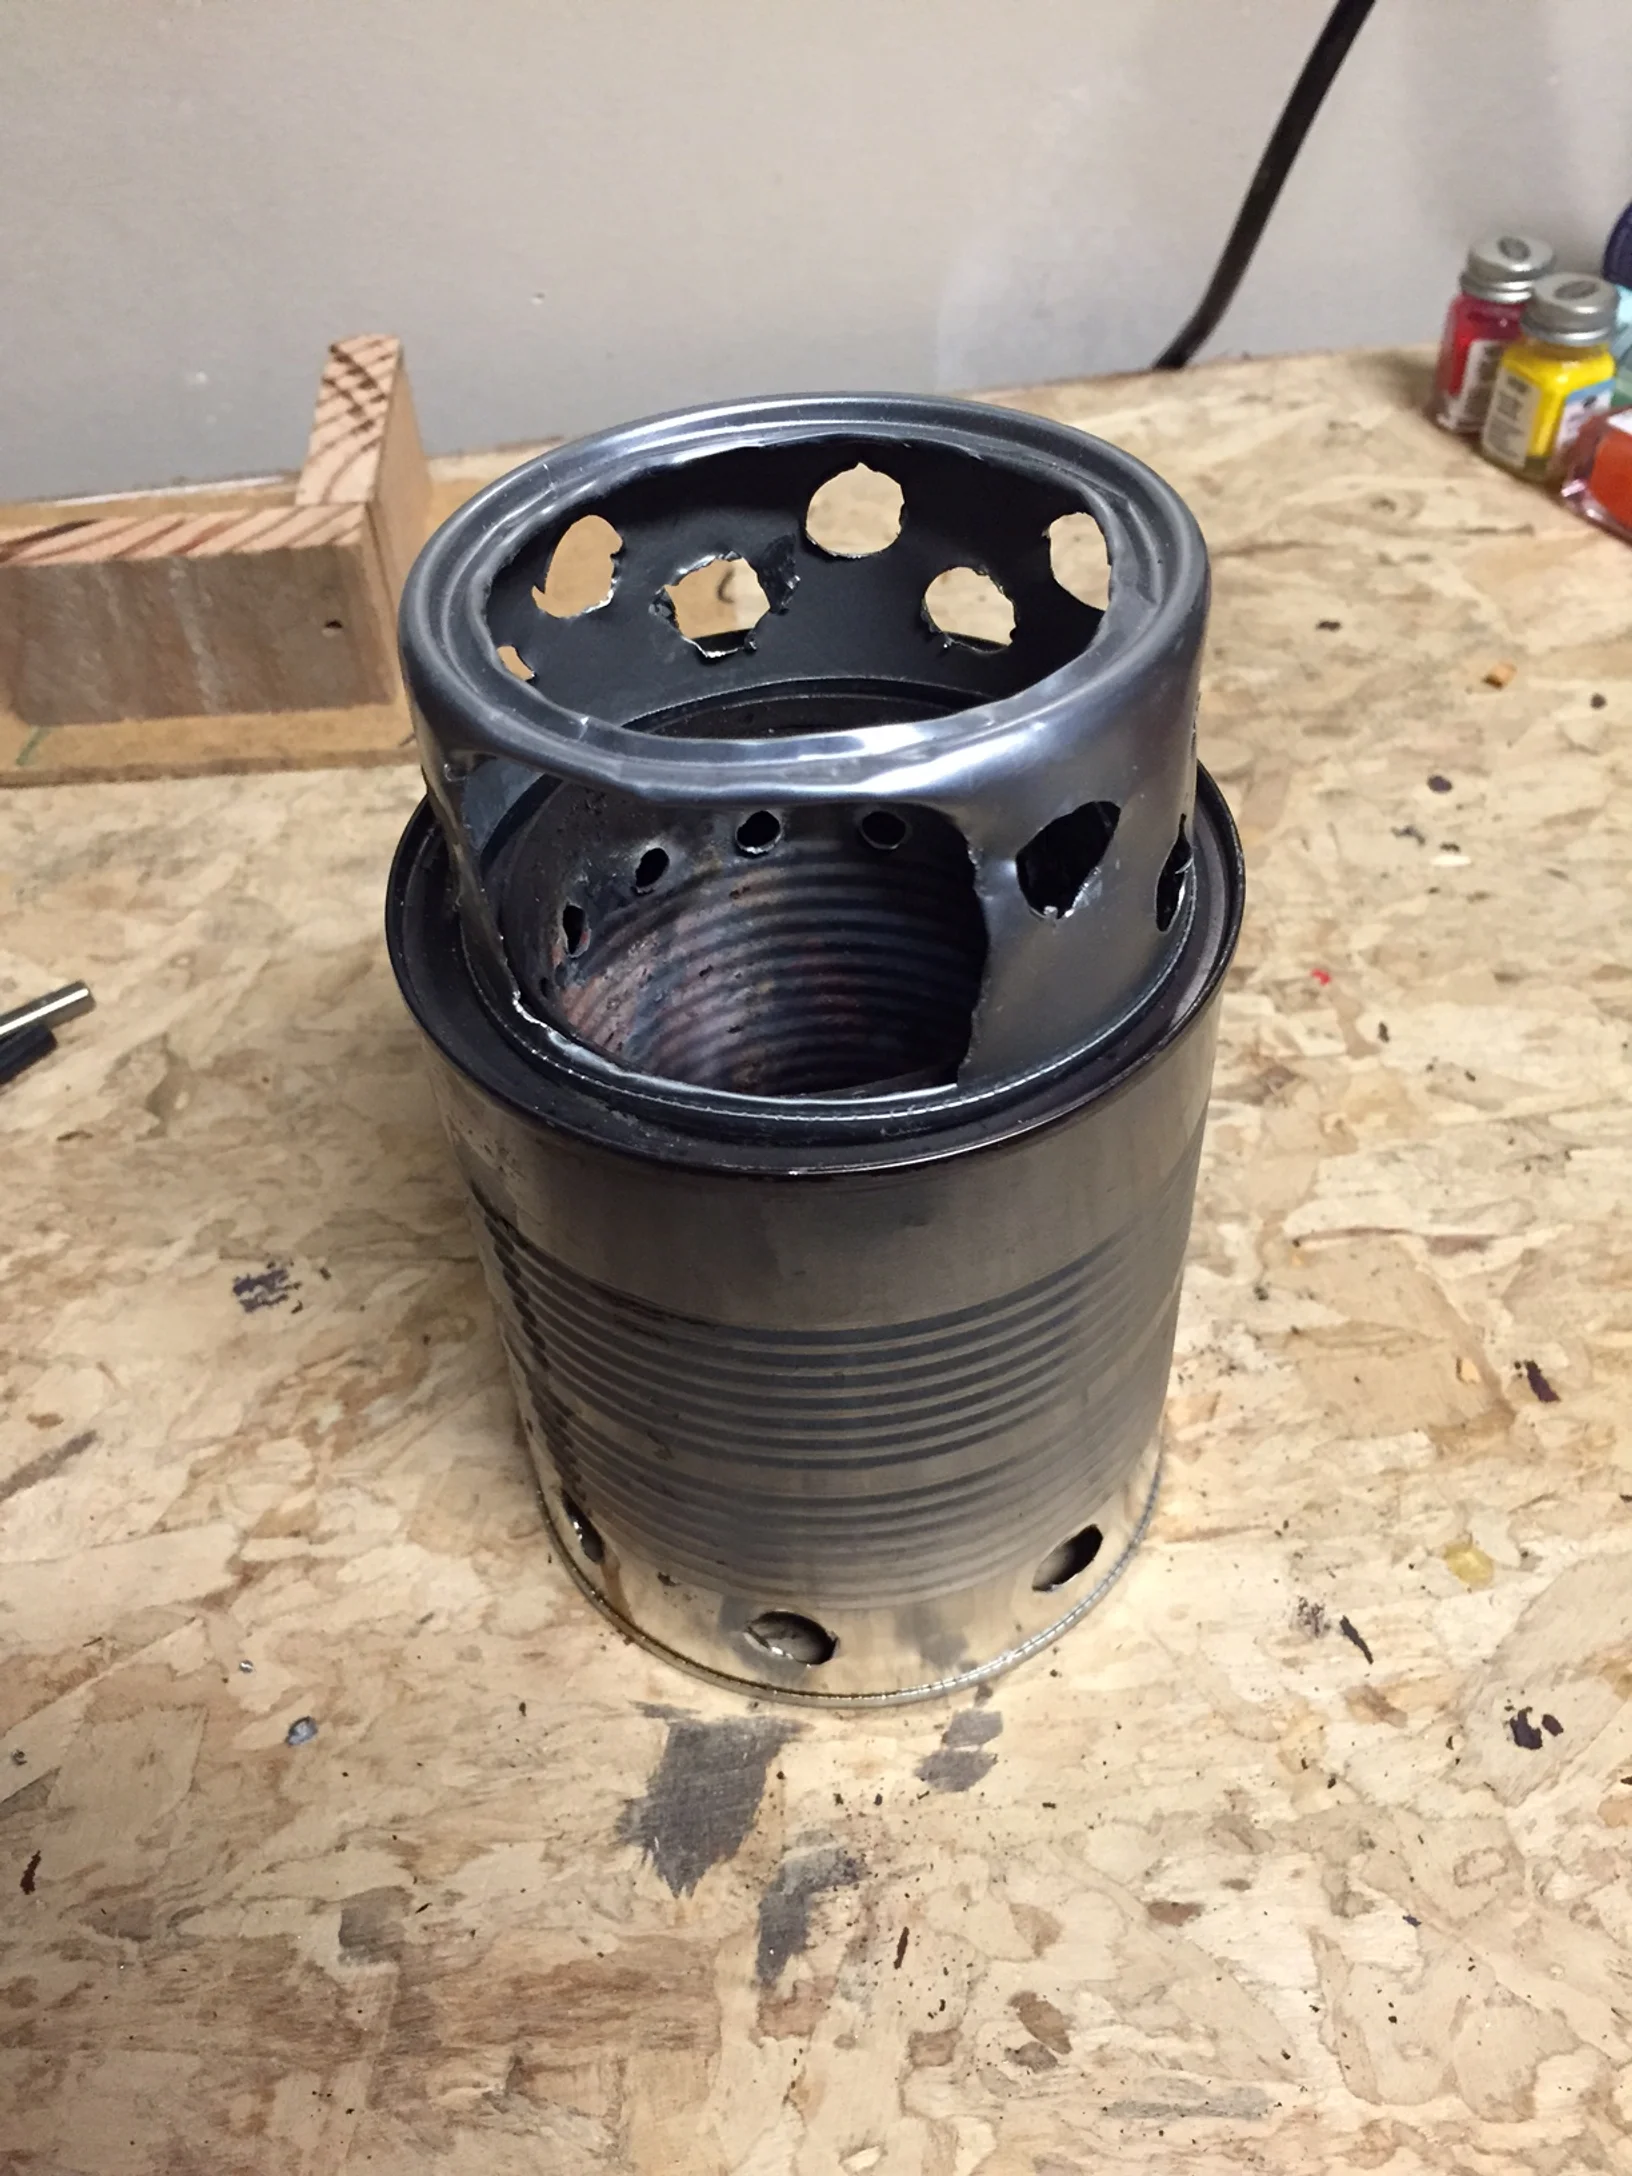
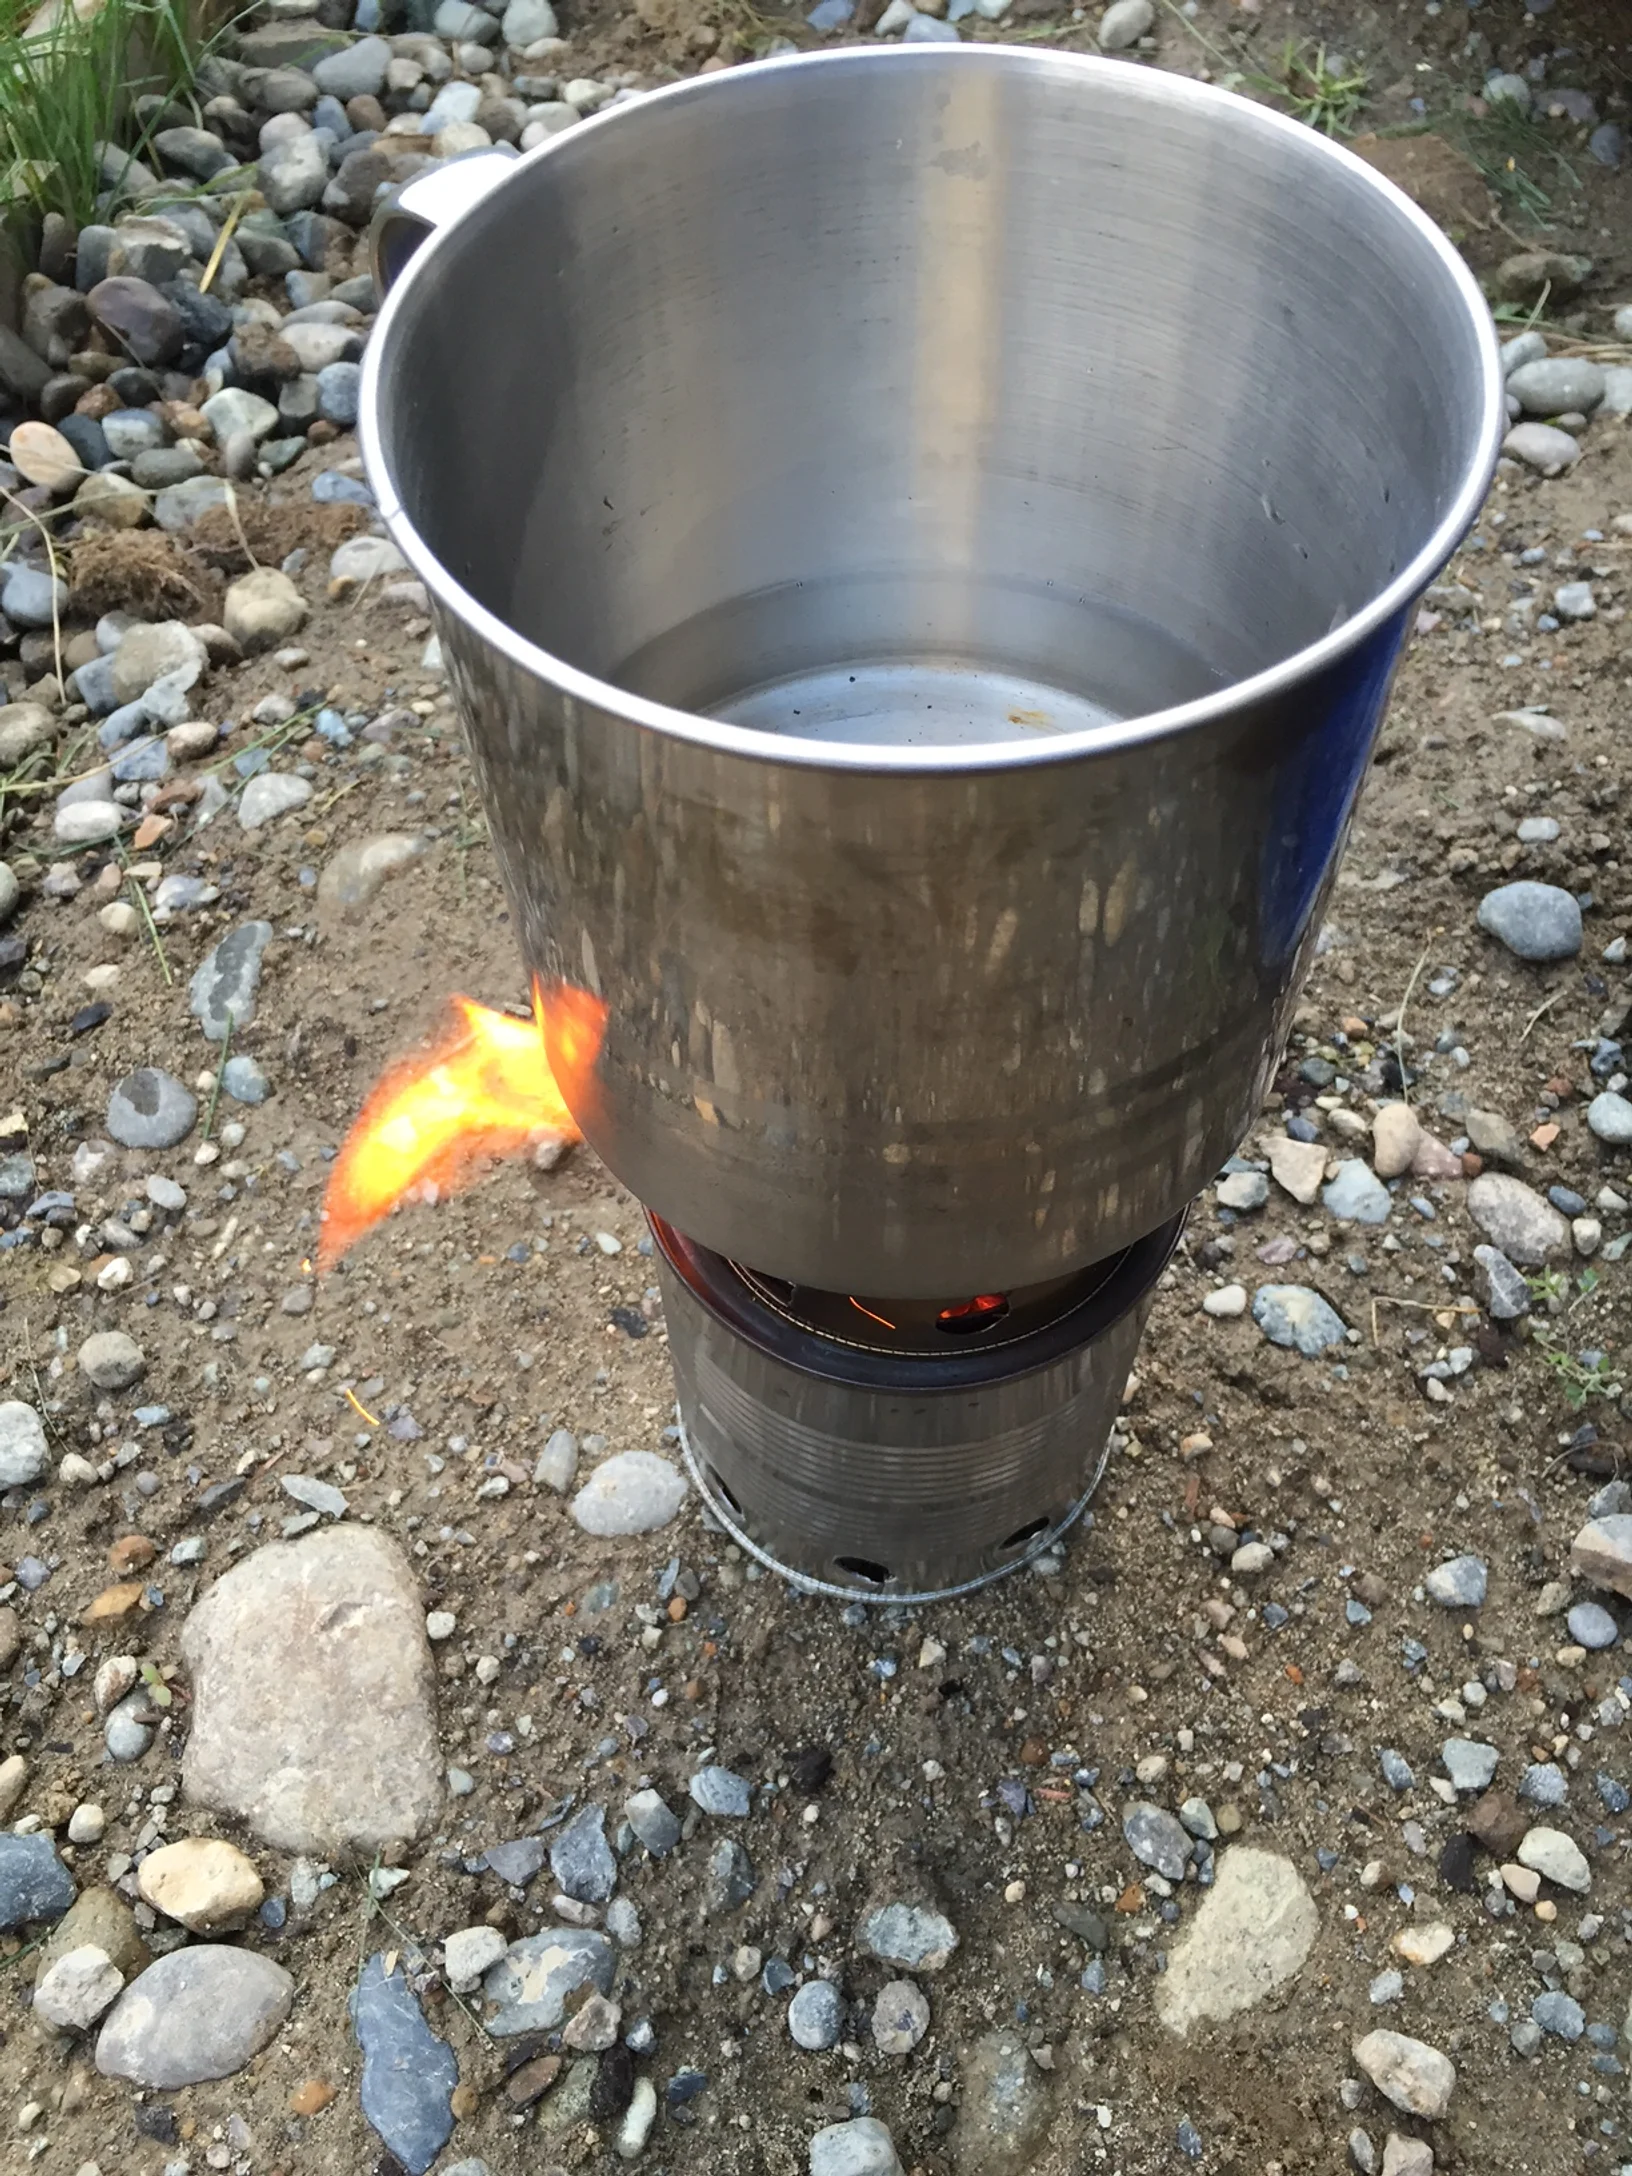
Shared Gear: Zpack’s Hexamid Duplex Cuben Fiber Tent, Snow Peak 900 Titanium Cook Pot, alcohol stove, 7’x7’ Homemade Tarp (for shade and added rain protection), 50 feet of bear line w/ carabiner and bag, Instapark Mercury 10 solar panel, Deuce of Spades trowel.

Becca’s Gear: Mountain Hardwear Thruway 50L backpack, Feathered Friends Vireo Nano 20 degree quilt, Thermarest Neoair Women’s sleeping pad, Black Diamond Z-Poles, Outdoor Research Echo hat, Marmot Crystaline Rain Jacket, Patagonia Houdini Wind Jacket, REI Primaloft Jacket, Columbia Omniheat vest, Outdoor Research mittens, beanie, head buff, 3 hiking shirts, 2 pairs of leggings, 3 pairs of socks (2 hiking + 1 sleep), running shorts, 2 bras, underwear, sunglasses, toiletries, Ipod Nano, headphones, Sawyer Mini Water Filter w/ 1.5L and 2L Evernew water bags, REI Litecore Sit Pad, food cozy, Sea to Summit long spork, Bearvault 500 (in required areas), camp shoes, Dirty Girl gaiters, Sea to Summit but headnet, REI Ducksback pack cover.

Tyler’s Gear: Boreas Buttermilks 55L backpack, Enlightened Equipment Enigma 20 degree quilt, Thermarest Neoair ¾ length sleeping pad, Outdoor Research Sun Runner Hat, Outdoor Research Helium 2 rain jacket, Patagonia Houdini Wind Jacket, Patagonia down shirt, Patagonia Houdini pants, REI Sahara shorts, Smartwool beanie, bandana, gloves, 2 Outdoor Research Echo hiking shirts, 3 pairs of socks (2 hiking + 1 sleep), REI silk bottoms (sleep), underwear, Ipod shuffle, headphones, Sony NEX 7 camera w/ 16-50mm lens, Lowepro camera bag, Joby gorillapod tripod, Iphone 5, Sawyer Squeeze water filter w/ 1.5L and 2L Evernew water bags, Klymit Cush sit pad/pillow, food cozy, Sea to Summit long spork, toiletries, sunglasses, Penrod fishing pole w/ spinning and fly reel, fishing forceps, flies/lures, Lighter1 Big Daddy Bear Canister (in required areas), camp shoes, Dirty Girl gaiters, Sea to Summit bug headnet.

Shoes: We each have 4 pairs of shoes that we’ll have available to send to us as we need them.

PCT_through_hike_pack_list

Becca: Merrell All Out Fuse, Salomon SpeedCross 3 (two pairs), Salomon Fellraiser
Tyler: La Sportiva Helios, Salomon SpeedCross 3, Merrell All Out Fuse, Salomon XA Pro 3D

CC: What kinds of meals are you planning?

T: We’re really big into freezer bag cooking. All of our hot meals will involve boiling water and rehydrating foods in a Ziploc freezer bag. Over the years we’ve come up with a few recipes that we really like, but we’ve added some new ones also. For breakfasts we’ve planned for oatmeal with peanut butter, grits, chia seed pudding with fruit juice, Belvita breakfast bars and muffins (We’ve figured out how to bake with our cook pot). For lunch we have a combination of things like peanut butter and honey flatbread, tuna salad pitas, couscous with cranberries and tuna and homemade beef jerky. We’ll have a ton of snack foods as well including dried fruit, fruit leathers, flavored honey straws, Kind and Cliff bars, Cliff Shot Bloks, Gatorade and flavored lemonade drink mixes, and various candies like Sour Patch Kids, Sour Patch Watermelons (the best while hiking), Swedish Fish, and sour gummy worms. Dinners were definitely the most complex and we wanted to have a lot of variety so that we won’t get bored of our meals. We have basics like mac and cheese, spaghetti and alfredo, but some other interesting things too. We have chili with fritos, “Thanksgiving” with potatoes, gravy, stuffing, cranberries and chicken, beef tacos, creamy potato soup, Indian curry, Pad Thai, Pizza Ramen, potato burritos, creamy mushroom rice with chicken, Shepard’s pie, and even sushi rolls. It has been a ton of work and we’ve packaged everything on our own.

PCT-meal-planning

CC: What's the most important thing you've learned in preparing for this?

T: We’ve definitely learned the importance of food and good nutrition. With 20 miles/ day averages in some stretches it’s really critical that you replenish what your body is using. We’re glad that we did everything ourselves because we know where the products come from and what we’re eating. All of this ties into larger themes of preparation. We have learned a lot about budgeting for two people in the long term. So far we’ve accomplished the most when working together so that will be a critical aspect of our success on the trail.

CC:  What advice would you give to others thinking about going? If it’s something that you’re really passionate about you should just do it. There are a lot of hurdles to jump in order to be able to pull off a trip like this, but make it happen now. You never know what the future will bring and what your opportunity will look like then. Start planning early. Double and triple check everything you’re taking. There are a lot of great resources out there to see what others are carrying and the pros and cons of gear and meals. The key is to make it your own hike and not get caught up in that stuff too much. If you absolutely have to have a particular item (i.e. fishing gear for Tyler) then you’re justified in taking it as long as you’re willing to carry the extra weight.

pacific-crest-trail-hikers

Thanks you for sharing your experience and planning with us Tyler and Becca. Enjoy the journey.

instructional article

DIY Wood Gasifier Backpacking Stove

----------   UPDATE 3/20/17   -----------

I've discovered an on the market option for wood burning backpacking stoves! The Firebox Nano 3" is amazing. It folds flat to be only 1/4" thick and weighs only 6 oz for the steel version or 4 oz for the titanium version. It can boil a cup of water in under 4 minutes and it runs on twigs! And in keeping with our brand ethos, it's made in the U.S.A. I like it so much that I've decided to over it in our shop. Click here to check it out. 

Now back to the previous journal entry:
--------------------------------------------------------------

wood-gasifier-backpacking-stove

As promised, I am reporting on my wood gasifier backpacking stove build. I took a few designs and morphed them together. I have tried a couple other versions in the past that failed because I tried to scale them down too small. This time I used a standard 14.5 oz can for the inside can and a 28 oz can for the outside can. The first step is to cut a hole in the base of the larger can so the smaller can will fit inside of it snuggly. Trace the diameter of the small can on the bottom of the large can and drill small holes about 0.5" in from there all the way around the lid. Then use wire cutters to cut the space in between those holes until the center falls out. Then trim up to the line drawn about every quart of an inch to make flanges that will fold down. AFTER you get the small can drilled, it will slide through that hole and fit nice and snug. Make sure to drill it first! I'll get to that part now. 

The key to getting this thing to work is airflow. I started by drilling 8 - 0.5" holes around the base of the outside can and the base of the inside can. Then drill 16 - 0.25" hole about 0.5" down from the top of the inside can. This design creates a vortex between the can and the hot gases/smoke jet back out of the smaller holes and into the flame. It ends up reburning the smoke and gases so it's very efficient and mostly smoke free. And it looks pretty cool as it burns. 

wood-gasifier-backpacking-stove

I did a couple test burns and found that it's best to load this thing backwards. Put the larger pieces in the bottom, then the smaller items, shavings and last the tinder. I used a bundle of twine fiber and a knot of twin soaked in wax. The fine fibers ignited quickly from the fire steel (This fire steel is part of a new product R&D. Don't tell anyone, it's a secret...) and the wax soaked knot burns long enough to catch the shavings under it. It ends up burning down until the larger items are all burning well. It makes for a lot less effort feeding the fire. I was using cedar and it burned pretty quickly. If you have access to it, I'd recommend hardwood chips. 

wood-gasifier-backpacking-stove
Fire-starter-wax-twine
colter-co-fire-starter-fire-steel

I also built a little pot stand out of a tuna can. The pot stand fits inside the bottom of the stove for storage.  In my test run I could get 2 cups of water to boil in about 12 minutes. It was pretty chilly and windy that day, so I think under better conditions (and with hardwood) I could get a boil going in less time. Still not bad for what it is. 

wood-gasifier-backpacking-stove

Overall I am very happy with the design. I will be taking it on my next outing and really put it through it's paces.  When not in use, the stove packs up nicely and fits inside the pot I use for backpacking. Very compact and light weight. 

Let me know if you've had success with a similar design.